
How to Repair Inflatable Products:
The Complete Damage-Type Guide for Commercial Operators
From punctured bounce houses to torn water slides — master every repair technique classified by damage type, material, and product category.
Whether you manage a fleet of rental inflatable bounce houses, operate a water park with inflatable water slides, or run events using commercial inflatable arches and tents, equipment damage is inevitable. A child’s shoe studs can puncture a bounce castle wall. A seam on an inflatable slide can split after three seasons of UV exposure. A D-ring anchor point can tear under wind load. The question is never whether damage will occur — it is how quickly and correctly you repair inflatable products when it does.
This guide classifies every common damage scenario by type, then provides the exact repair protocol for each — covering land-based inflatables (bounce castles, obstacle courses, inflatable tents) and water-based inflatables (water slides, inflatable pools, floating obstacles) separately, since they demand different materials, adhesives, and curing methods.
01 Essential Repair Kit & Materials
Every commercial inflatable operator should maintain a dedicated repair kit. The materials you choose directly determine repair durability. Using household adhesives or inappropriate patch materials is the single most common cause of repair failure.
Core Materials & Tools
02 Leak Detection: Finding the Invisible
Before any repair, accurately locate the damage. Even a 1 mm pinhole causes noticeable deflation over hours on airtight inflatables.
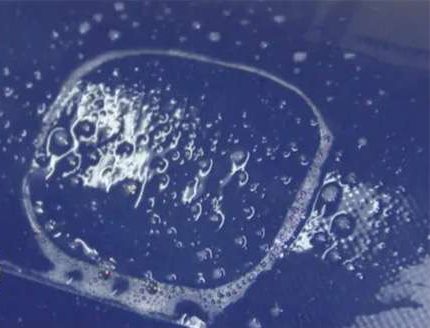
Method 1: Soapy Water Spray Test
- Mix 1 part liquid dish soap with 4 parts water in a spray bottle.
- Fully inflate and ensure the surface is completely dry.
- Spray generously over seams, D-ring points, blower connections, zippers, and valve stems.
- Watch for persistent bubble streams — mark with waterproof marker.

Method 2: Talcum Powder Test
Dust a thin layer of talcum powder over the surface. Escaping air blows powder away from the leak point, creating a clean ring.
Method 3: Listen & Feel
In a quiet environment, listen for the characteristic hissing sound. Or run the back of your hand slowly across the surface — even the faintest air stream is detectable by sensitive skin.
03 Type 1 — Punctures, Pinholes & Small Cuts (<5 cm)
Most common damage category. Punctures typically result from sharp objects (shoe studs, jewellery, fallen branches, pet claws). On water slides, often from rough ground during setup.
Repair Protocol: Standard PVC Patch
- Deflate & Flatten: Fully deflate. Lay the damaged area flat on a clean, dry surface. Never patch while inflated.
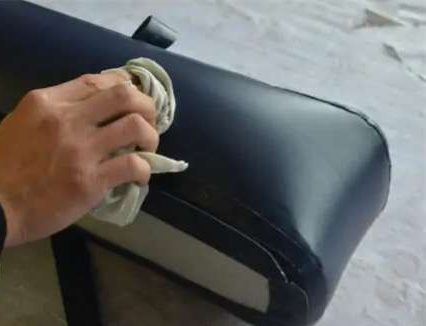
- Clean & Dry: Wipe with isopropyl alcohol on lint-free cloth. Remove all dirt, grease, old adhesive. Surface must be 100% dry.
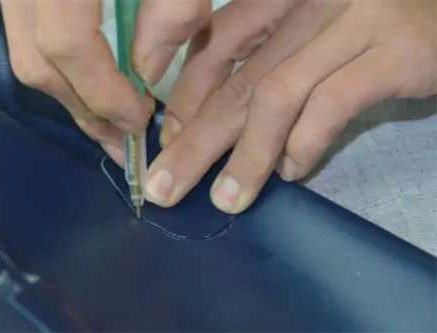
- Cut the Patch: Cut matching PVC extending at least 3 cm beyond damage on all sides. Round all corners — sharp corners create stress concentration that peels over time.
- Apply Adhesive: Mix resin and hardener. Apply thin, even coat to both patch back and product surface.
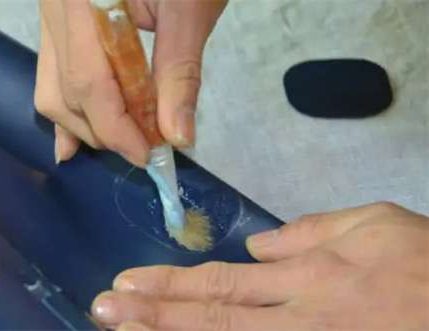
- Wait for Tack: Allow adhesive to become tacky but not stringy (typically 2–5 minutes depending on temperature/humidity).
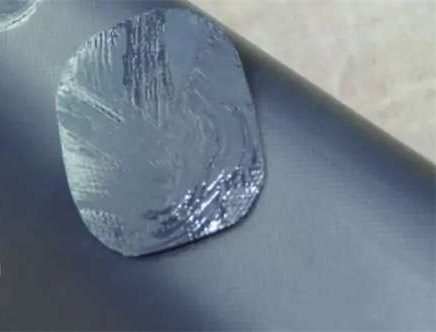
- Align & Press: From centre, lower patch onto damage. Smooth outward with palm, then use seam roller from centre to edges.
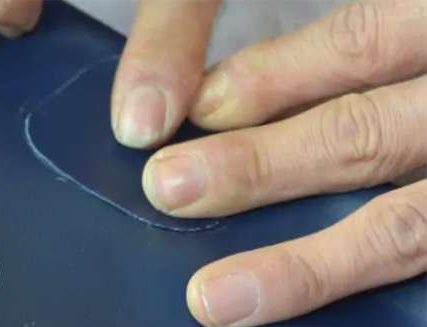
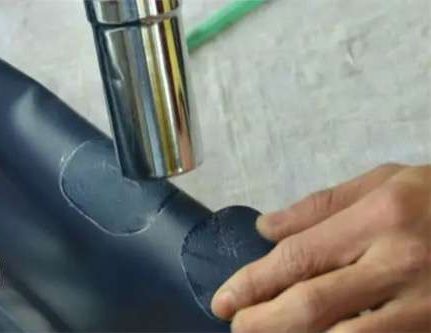
- Clamp & Cure: Apply even pressure with C-clamps or sandbags. Cure 6–12 hours at room temperature. For water slides, wait full 48 hours before water contact.
Single Pinhole Shortcut
For isolated pinholes smaller than 2 mm, skip the patch. Apply small dab of PVC adhesive directly with a toothpick. Cure 12 hours minimum.

04 Type 2 — Surface Tears & Large Rips (>5 cm)
Large tears typically occur at high-stress zones: transition from stairs to bounce surface, entrance ramp seams, slide lane junctions. On inflatable tents, often from wind-loading at anchor points.
Repair Protocol: Stitch-and-Patch Reinforcement
- Align & Clamp: Deflate. Align torn edges. Use masking tape on outside to hold temporarily.
- Restitch: Using heavy-duty UV-resistant polyester thread and curved upholstery needle. Sew 2 cm beyond each end of visible tear to prevent propagation.
- Prepare Reinforcement Patch: Cut PVC oval covering full stitched area plus minimum 3 cm overlap. Round all corners.
- Adhere Patch: Follow standard adhesive protocol: clean, coat, tack, press, clamp, cure.
Special Case: Entrance Tunnel & Slide Chute Tears
These zones experience constant friction. Apply a wear-resistant overlay after patching: extra PVC strip slightly wider than repaired area. This sacrificial layer extends repair life by 2–3x in high-traffic rental environments.
05 Type 3 — Seam Separation & Stitching Failure
Most structurally consequential damage type. A failed seam can redistribute load to adjacent seams, potentially triggering cascade failure known as “zippering.”
Identifying Seam Failure
- Visual: The “smile curve” — a formerly straight seam that has developed a noticeable bow indicates internal baffle or tension failure.
- Behavioural: Product inflates unevenly with certain sections bulging abnormally.
- Tactile: Loose threads, or ability to visibly separate seam edges with gentle hand pressure.
Repair Protocol: Internal Seam Restoration
- Access the Interior: Deflate and enter through main zipper. Locate failed seam from inside.
- Realign: Pull separated edges back into alignment. Restitch through original stitch holes for maximum integrity.
- Double-Needle Reinforcement: For high-stress zones, add second parallel row of stitching ~5 mm from original.
- Apply Internal Patch Strip: Cut long PVC reinforcement strip matching full seam length plus 5 cm at each end.
- External Reinforcement (if needed): Mirror internal patch with external strip for “sandwich” configuration — standard for commercial slides and large obstacle courses.
- Reinforce Stress Points: At 90° corners and D-ring attachments, add diamond-shaped PVC cushion pad glued both inside and out.
06 Type 4 — Water Slide-Specific Damage
Water slides, water parks, and floating obstacle courses face: constant water exposure, chlorine/salt corrosion, user friction on wet surfaces, and biological growth.
Critical Differences from Land Inflatable Repairs
| Factor | Land Inflatables | Water Inflatables |
|---|---|---|
| Adhesive | Single-part PVC cement or HH-66 sufficient | Must use two-part PU adhesive |
| PVC Thickness | 0.45–0.55 mm standard | 0.65–0.9 mm heavy-duty |
| Curing Time | 6–12 hours | Minimum 48 hours; no water contact |
| High-Stress Zones | Bounce floor, entrance ramp, seams | Slide lane surface, climbing wall base, splash pool |
Common Water Slide Damage Scenarios
A. Slide Lane Surface Tears
After patch cures, apply thin coat of PU adhesive and dust with fine talcum powder for textured, low-friction top coat matching original slide feel.
B. Climbing Wall Bottom Damage
Highest stress zone on entire structure. Repair: restitch → internal patch → external patch → optional heat-weld panel.
C. Blower Tube & Air Connection Leaks
Ensure tube fully wraps around blower outlet with drawstring pulled tight. If fabric tears, patch standard. If drawstring stretched, replace with paracord (550 cord).
D. Splash Pool Seam Leaks
Apply UV-resistant seam sealant along full seam line, press with roller, cure 24 hours. For persistent leaks, apply secondary external patch.

07 Type 5 — Structural & Internal Baffle Damage
Internal baffles maintain product shape and structural rigidity. When a baffle tears or detaches, the affected section bulges or collapses, redistributing internal pressure dangerously.
Symptoms of Baffle Failure
- One section bulges abnormally while adjacent sections appear under-inflated.
- Bounce floor becomes convex (rounded upward) instead of flat.
- Inflatable tent or building leans or sags to one side.
Repair Protocol
- Diagnose: Inflate and visually identify misshapen section. Failed baffle is typically adjacent to bulging area.
- Enter Internally: Deflate completely. Enter through main zipper.
- Locate & Repair: Find torn or detached baffle. Stitch reinforcement patch onto baffle material first, then reattach with double-row stitch pattern.
- Test: Partially inflate (50%) and observe shape restoration. If baffle holds, fully inflate and perform 30-minute test.
08 Seasonal Maintenance Schedule
Preventive maintenance can extend service life by 40–60% and dramatically reduce mid-season downtime.
Pre-Season (Spring Setup)
- Unpack and visually inspect for mould, pest damage, storage deterioration.
- Test inflate and run full soap-water leak test.
- Check all D-rings, anchor stakes, sandbag attachment points.
- Inspect and test all blowers: noise, airflow output, power cables.
- Verify all repair patches from previous season are still fully bonded.
Mid-Season (Peak Operation)
- Weekly visual inspections during active rental service.
- Clean with pH-neutral vinyl cleaner after each event. Never use bleach or abrasives.
- For water slides: rinse with fresh water after every use, especially after chlorine/saltwater.
- Address small punctures immediately.
- Rotate product orientation by 180° to distribute UV exposure evenly.
Post-Season (Winter Storage)
- Deep clean: wash surfaces, clean seams, inspect every stitch line.
- Remove mould or mildew with vinyl-safe remover.
- Critical: Ensure 100% dryness before storage. Inflate with all zippers open and run blowers until internal moisture evaporated.
- Roll tightly, store in cool, dry, rodent-free environment.
- Store blowers separately in dry containers. Remove and inspect power cables.
09 Lifespan Expectations by Product Category
Realistic lifespan helps budget for replacement and make informed repair-vs-replace decisions. Figures assume regular commercial use with proper maintenance.
| Product Category | Typical | With Excellent Maintenance | Common Failure Points |
|---|---|---|---|
| Inflatable Bounce Houses | 3–5 years | 5–8 years | Bounce floor seams, entrance ramp, internal baffles |
| Inflatable Slides (Dry) | 3–5 years | 5–7 years | Slide surface friction, seam stitching at curves |
| Inflatable Water Slides | 3–5 years | 5–7 years | Slide lane tears, climbing wall base, chlorine degradation |
| Inflatable Obstacle Courses | 3–4 years | 5–6 years | Pop-up obstacle seams, tunnel connections |
| Inflatable Tents / Buildings | 5–7 years | 8–12 years | Anchor point stress, UV degradation of roof |
| Advertising Inflatables | 4–6 years | 7–10 years | UV fading, seam leaks at joins |
| Water Park Floating Obstacles | 2–4 years | 4–6 years | Constant water/chlorine, UV, user abrasion |
Repair vs. Replace Decision Matrix
QR Repair at a Glance
| Damage Type | Size | Method | Cure Time | Difficulty |
|---|---|---|---|---|
| Pinhole | <2 mm | Direct adhesive dab | 12 hrs | Beginner |
| Puncture / Small Cut | <5 cm | PVC patch (round corners) | 12–24 hrs | Easy |
| Large Tear | >5 cm | Stitch + reinforcement patch | 24 hrs | Moderate |
| Seam Separation | Variable | Internal restitch + sandwich patch | 24 hrs | Advanced |
| Water Slide Tear | Variable | PU adhesive + textured overlay | 48 hrs | Moderate |
| Internal Baffle | Variable | Internal access + restitch + patch | 24 hrs | Expert |
10 Frequently Asked Questions
What is the best glue for repairing commercial inflatables?
Use a two-part polyurethane (PU) adhesive (e.g. HH-66 Vinyl Cement) for permanent chemical bonding. Never use super glue, duct tape, or household white glue.
How long does a PVC patch repair take to cure?
For land-based inflatables, allow 12–24 hours before service. For water slides, wait a full 48 hours before any water contact.
Can I repair an inflatable water slide myself?
Yes, if damage is surface-level (punctures, tears under 30 cm, seam leaks). For structural issues (internal baffle failure, D-ring damage), seek professional factory repair.
How do I prevent future damage to my inflatables?
Implement strict “no shoes” policy. Use ground tarps during setup. Avoid rough surfaces (gravel, loose asphalt). Store units fully dry and out of direct sunlight. Conduct weekly visual inspections.
Send Us an Inquiry
Interested in our inflatable products? Fill out the form below and our experts will contact you shortly.
This site is protected by reCAPTCHA and the Google Privacy Policy and Terms of Service apply.